Behavioral Cloning for Self-Driving Cars
Teaching a Car to Mimic Human Driving
In this post we learn how to teach a car to drive itself around a track by looking only at images of the road. The task was achieved on a simulator provided by Udacity. A convolutional neural network (CNN) was designed in Keras to predict steering angles from images captured by 3 cameras attached to the front of the car. For training the network, the car was driven around the track and images were collected using the cameras. The steering angles were also recorded at the same time. These images along with the steering angles were then fed into the CNN for training. Finally, the car was able to learn to maneuver around the track autonomously only with the help of images collected from the cameras.
The complete code for the project can be found here.
Model Architecture and Training Strategy
Solution Design Approach
The overall strategy for deriving a model architecture was to start with a very simple convolution neural network. This is because the most important cue for determing the steering angle was to determine the curvature of the road. At the same time it was also important for the network to distinguish between road and markings, gravels etc. along the sides of the road. So, I used color images to help the network learn these details.
My first step was to use a convolution neural network model similar to the LeNet-5. I thought this model might be a good starting point because the most important cue in the images to control the steering angle is the curvature of the road which can be easily detected by using simple edge detectors.
I used ELU() as the activation layer because they are found to work better than ReLU in ImageNet challenges.
In order to gauge how well the model was working, I split my image and steering angle data into a training and validation set. I found implied that the model was underfitting due to high training and validation mean squared loss. Also the car’s performance on the track in the autonomous driving mode was not good as it was falling off the track at the corners.
I next used the a relatively complex convolution neural network model used in a Nvidia paper. Although I found that the network this led to a reduction in training and validation mean squared loss, the car didn’t perform very well due to overfitting.
To combat the overfitting, I modified the model to add a dropout layers after every layer. After making a few tweaks to the dropout probabilities, the car was able complete the track in autonomous driving mode.
This led me to settle down at an architecture that had a lower complexity than Nvidia’s architecture. Comma.ai’s convolutional neural network model as described in this Github repo worked perfectly well on the track. It contains 3 convolution layers follwed by 2 fully connected layers with dropout layers in the fully connected layers.
At the end of the process, the vehicle is able to drive autonomously around the track without leaving the road.
Final Model Architecture
The final model architecture consisted of a convolution neural network with the following layers and layer sizes.
| Layer | Kernel Size | Number of filters | Stride | Description | Padding |
|---|---|---|---|---|---|
| Input | - | - | 100x100x3 pre-processed image | - | |
| Convolution | 8x8 | 16 | 4x4 | outputs 25x25x16 | Same |
| ELU | - | - | - | activation function | - |
| Convolution | 5x5 | 32 | 2x2 | outputs 13x13x32 | Same |
| ELU | - | - | - | activation function | - |
| Convolution | 5x5 | 64 | 2x2 | outputs 7x7x64 | Same |
| Flattening | - | - | - | outputs 3136 | - |
| Fully Connected | - | - | - | 3136 input, 512 output | - |
| ELU | - | - | - | activation function | - |
| Dropout | - | - | - | drop probability (0.2) | - |
| Fully Connected | - | - | - | 512 input, 1 output | - |
| ELU | - | - | - | Activation function | - |
| Dropout | - | - | - | drop probability (0.5) | - |
| Output | - | - | - | steering angle | - |
Here is a visualization of the architecture.

Below is the code for designing the model in Keras 1.0.
model = Sequential()
model.add(Convolution2D(16, 8, 8, subsample=(4, 4), input_shape=(80,320,3), border_mode="same"))
model.add(ELU())
model.add(Convolution2D(32, 5, 5, subsample=(2, 2), border_mode="same"))
model.add(ELU())
model.add(Convolution2D(64, 5, 5, subsample=(2, 2), border_mode="same"))
model.add(Flatten())
model.add(Dropout(.2))
model.add(ELU())
model.add(Dense(512))
model.add(Dropout(.5))
model.add(ELU())
model.add(Dense(1))
model.summary()
Creation of the Training Set & Training Process
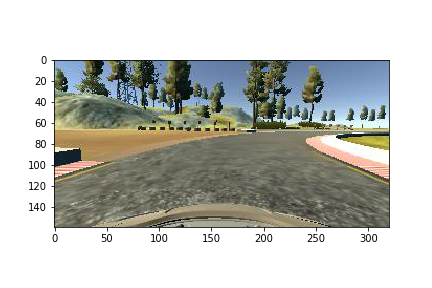
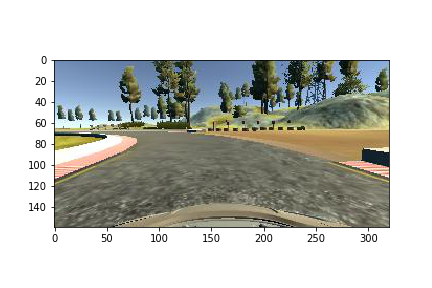
I used the dataset provided by Udacity to train the CNN. Below are a few sample images from the dataset.

Since the track is in the form of a circle and the dataset contained images collected by driving car in clockwise direction only, there were more number of right steering angles as can be seen from the histogram of steering angles.
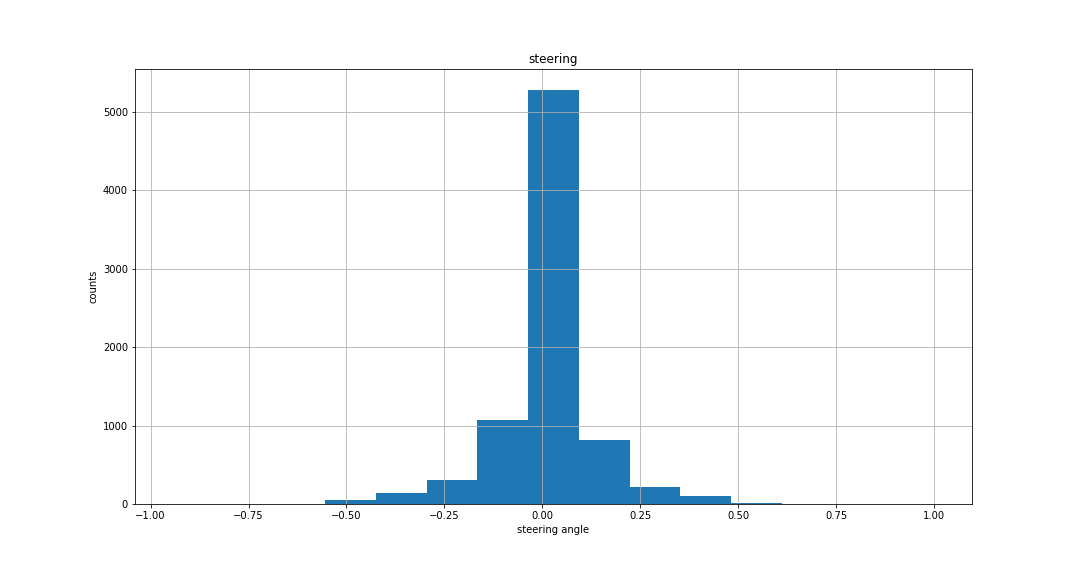
There are a lot of steering angles close to 0 which tend to make the network biased towards giving values close to 0 steering angle in the output. To remove this bias, I randomly discarded 70% of the data samples that had steering angles between [-0.1, 0.1].
To further improve the distribution of steering angles I used a few data augmentation techniques which have been explained next.
Data Augmentation
To balance the data and to add more meaningful data to my training data without manually driving the car around the tracks, I used a few data augmentation techniques as discussed in the Nvidia paper and this blog post.
Using the right and left camera images
There are 3 cameras attached at the front of the car in the center, left, and right. I used the left and right camera images for recovery i.e. I added a small angle of 0.25 to the steering angle for left camera and subtracted a small angle of 0.25 from the right camera. The main idea being the left camera has to move right, and right camera has to move left to get to the center. So, basically I treated the left and right camera images as center images by adjusting the steering angles. This led to a 3 fold increase in training data.
This also works as the recovery data which helps the vehicle recover from the left side and right sides of the road back to the center. This helps the vehicle to learn to return to the center of the track everytime it sways away from it. For example, here is an example showing the center, left, and right images with the modified steering angles.
Flipping the images and reversing the steering angles
To remove the bias of the network to move towards the right as it was driven in the clockwise direction along the track during training, I flipped all the images so that they would resemble driving along the track in the anti-clockwise direction. This helped me balance the steering angle distribution to be more even and symmetric about the 0 steering angle.
For example, here is an image that has then been flipped:
Brightness augmentation
I also randomly changed the brightness of the images in the datatset to simulate driving in different lighting conditions.
def augment_brightness_camera_images(image):
    image1 = cv2.cvtColor(image,cv2.COLOR_RGB2HSV)
    random_bright = .25 + np.random.uniform()
    image1[:,:,2] = image1[:,:,2]*random_bright
    image1 = cv2.cvtColor(image1,cv2.COLOR_HSV2RGB)
    return image1
For example, here are a few images after brightness augmentation.

After the data augmentation process, I had about 30000 data samples; 4 times the data in the original dataset.
Data Pre-processing
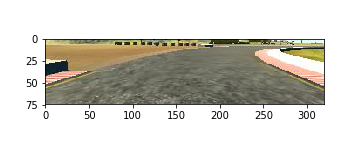
Since, the scenery contained in the images are not necessary to predict the steering angle I removed 60 pixels from the upper half portion of the images.
Also, the hood of the car was visible at the bottom of the image which I removed 25 pixels from the bottom as well.
Here’s how a sample image looks like after cropping.
Further, I resized the images to a size of 100x100 to increase training and processing speed. After images, the images contain sufficient information to identify the curvature of the roads.
Here’s how a sample image which is being fed to the CNN looks like after data pre-processing.

I performed all the pre-processing steps before feeding them to the model to avoid repeating the pre-processing steps in every epoch of training.
I finally randomly shuffled the data set and put 20% of the data into a validation set.
I used this training data for training the model. The validation set helped determine if the model was over or under-fitting. The ideal number of epochs was 5 as beyond that the training loss and the validation loss remained almost same and the performance of the vehicle on the track did not seem to improve. I used the adam optimizer as it doesn’t require the learning rate to be adjusted manually.
Training method
Optimizer: Adam Optimizer
Starting learning rate: 0.0001
No. of epochs: 5
Images generated per epoch: 9984 images generated on the fly
Validation Set: 2500 images, generated on the fly
Keras’ fit\_generator() method was used to train images generated by the generator
Project Video